If you don’t like any sort of knots in your crochet item then Russian Join Method could be the one for you. This technique of joining new skein/ball of yarn allows you to join old skein with new one so it looks like one continuous piece of yarn (well, almost!)
PROS: No visible knots.
CONS: Ticker yarn in the point of joining, as a result you will end up with few slightly bigger stitches.
RUSSIAN JOIN TUTORIAL
Note: I’ve used 2 colours of yarn to make the tutorial easier to understand.
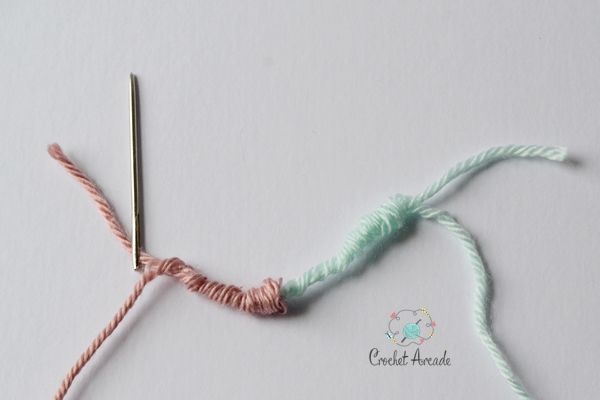
Step 1 – Cross end of old skein with end of new skein as shown on the photo below. Leave longer ends if you want the join to be extra secure.

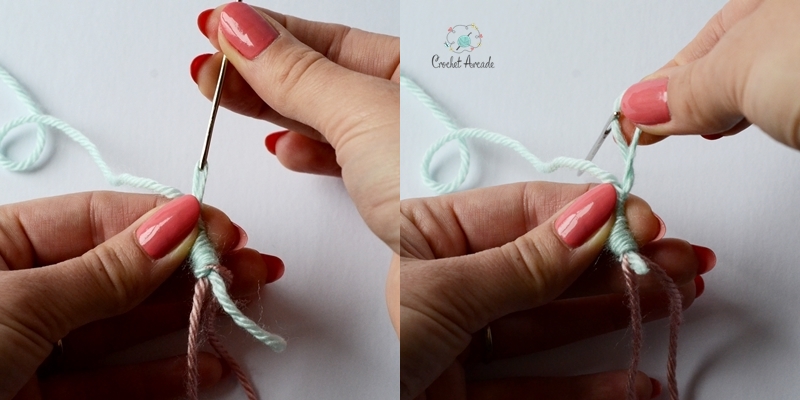
Step 2 – Thread the yarn you want to join on the yarn/tapestry needle.

Step 3 – Insert the yarn needle in the middle of the yarn strands. Push push the strands down the needle while you’re doing it until you cover the whole needle (the deeper you will go into new yarn the more secure join you will achieve).

Step 4 – Pinch the top of the stands and pull the needle of out the yarn, then grab the yarn end and pull it out completely.
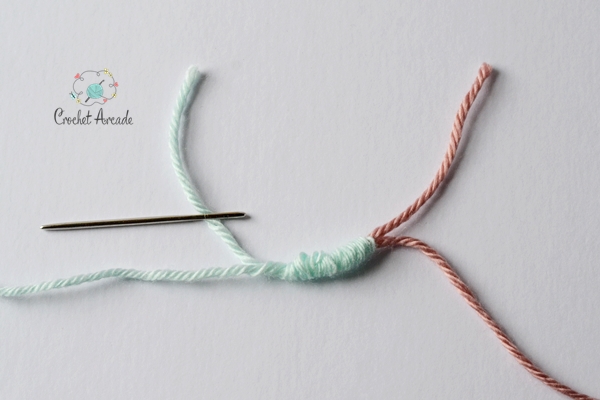
That’s the result of first 4 steps:
Step 5 – Take the yarn needle and thread it on to end of old yarn.

Step 6 – Flip the ends if it’s easier and insert the needle in the middle of the strands right after where the two ends meet.

Step 7 – The same as in step 3 continue pushing the needle through the strands of yarn while pushing them down the needle until it’s completely covered.

Step 8 – Repeat step 4.
Step 9- Take the needle off and grab new and old working yarn.

Step 10 – pull on both pieces of yarn simultaneously until both ends of the yarn will ‘hide’ inside of the yarn strands.

To even the joint out, slide your fingers through the yarn in opposite directions starting from were the yarns meet.

Clip off the excess yarn with the scissors as close to the yarn as you can.
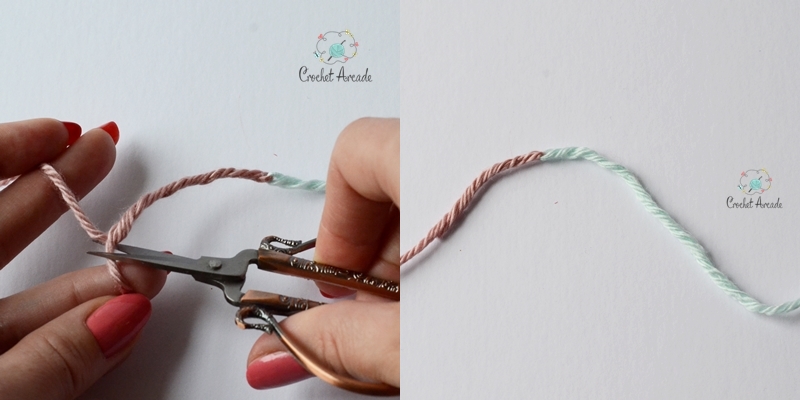
This is the result of finished Russian Join:

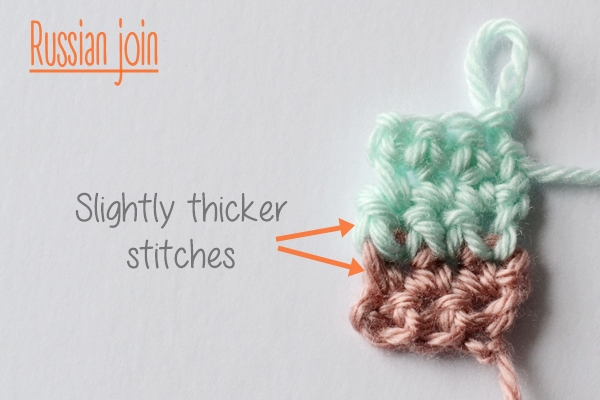
And this is how the crochet fabric looks when working with Russian Join, as you can see end stitches (where the join was) are slightly chunkier then other stitches but other then that everything looks nice and neat with NO KNOTS!
Hope you enjoyed this tutorial. Happy Crocheting!